
Easy Does It - With Quilted Leftovers
Leftover fabric is all over my sewing room and office studio. Seriously, what do we do with all the leftover's? A few months ago I quilted up two of our 115" wide batik cotton fabrics and cut out a Tamarack Jacket with a hoodie from this fabric. I had quilted 54" at 115" wide - which ends up to be a lot of quilted fabric. I used almost a full yard at 115" wide for the jacket which left me with 18" by slightly less than 115" wide fabric left to play with.
What to do with Leftovers?
There are so many great options for utilizing quilted fabric.
- Pillows
- Simple long table runner
- Four (4) matching placemats
- Notebook cover
- Baby clothing like a quilted jacket
- Totebag
- Cosmetic bag
There are truly so many options for this amount of fabric. I decided on sewing an Easy Does It cosmetic bag with a pattern designed by ByAnnie's Patterns.
My Hesitation:
I hesitated on making a ByAnnie's pattern without using the Soft and Stable product inside the quilted fabric sandwich. Her patterns are meant for Soft and Stable. However, I truly wanted to add to my sewing skills with this pattern. I'm getting better at inserting zippers, binding tight and thick fabric layers, and top stitching evenly and professionally.
I decided this was a great project for the quilted fabric and I need a new cosmetic bag.
Lessons Learned about Easy Does It:

The Easy Does It pattern is a skills building project for anyone not familiar or experienced with sewing ByAnnie's Patterns. We have prepared project kits for this item for those of you who want to start with a complete kit. This project requires the following items:
- Two fat quarters of fabric for the outside and lining
- 15" zipper (a 30" Zipper will make 2 bags)
- Fat quarter of Soft and Stable
- Little bit of interfacing for the two side handles
- Zipper foot and standard foot
- Size 14 Top Stitch Needles (strongly recommended)
- ByAnnie Stiletto (strongly recommended)
I started this project with leftover quilted batik that I used to sew our Tamarack Jacket. There was left over lining fabric to use as the handles and I matched our fabric to a ByAnnie Zipper in the shade of Parrot Blue.

I prepared all the pieces including the bias binding strips used to cover the inside seams. Make sure you sew 1/8" around each of the quilted pieces to seal the fabric edges. The quilting design I used is a bit open so it's very important to seal the side edges.

The image above shows a completed zipper strip and the two side panels. The zipper is sewn to two top segments. Two side handles are sewn to the side/bottom segment. The top and side/bottom are sewn together to create a circle that becomes the top/bottom of the bag. This is a very easy portion of the bag assembly.

Now for a bit of intrigue.
One thing to remember about preparing the two side panels is to cut round edges on all four corners. The pattern recommends a 2 1/2" circle as your template. It is important to use a 2 1/2" circle for this step. Just now that the bottom of a So Fine thread cone is 2 1/2" exactly.
I did use the bottom of a thread cone but for some reason my corners are not as round as they should be. They turned out a bit too tight. I'm going to create a template from template plastic to use on all my future ByAnnie's patterns.
Mark the centers of all four sides of the side panels.
Mark the centers of all four sides of the top/bottom zipper strip as well. This is an important step because we want our left and right handles to be at the same height from the top of the bag.

The pattern guides you through the process of sewing the side panel to the zipper strip. In the illustration above I have already sewn one side panel to the zipper strip and added the binding to completely cover the seams.
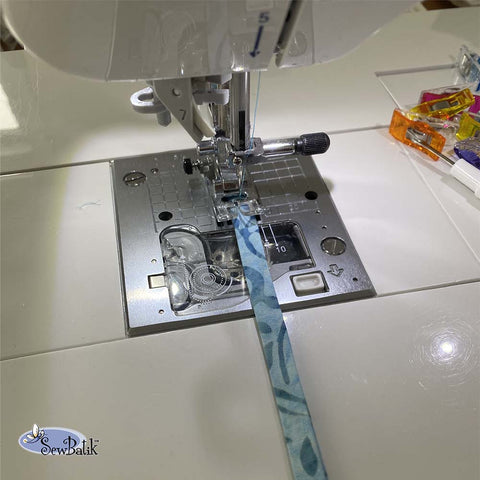
Always position the side panel against the bed of your sewing machine. The zipper strip can be adjusted to fit your side panel.
I started this project using my zipper foot - almost exclusively. However, I found it easier for me to sew a 1/8" and 1/4" with my standard presser foot. Use whichever foot works best for you.
This portion of the project requires your machine to sew through several layers of fabric and stabilizer. I recommend a size 14 topstitch needle. They are larger and stronger which is needed for most bag projects. Remember to sew slowly.
BINDING:
It is worth a few minutes to talk about seam binding. One of the great features of ByAnnie's patterns is the way she finishes the exposed seams. the seams are always finished with traditional quilt binding. It's a beautiful finish.
I followed Annie's instructions on how to join the ends of the binding strips. She likes to use the "quilt' method of joining the ends. Sewing the ends at a diagonal.
I found it very cumbersome to join the ends in this traditional manner because the side of the bag is very short. If the binding was on the outside of the bag I would have continued down this path. Since the binding is inside the bag I would recommend joining the ends by sewing a straight join or by covering the join with a small tab of fabric.
And finally, don't forget to sew a simple zipper tab to complete your project. Start with a 1" strip of coordinating fabric. Press the strip in half along the long edge. Fold each long edge meeting at the middle fold and press. Finally, fold both edges flat to totally enclose the long edges. Top stitch along the open edge. Tie the tab to your zipper.
In Summary:
Here are a few quick lessons learned from this project:
- Cut the corners on your side panels using a good 2 1/2" circle template. It will make it easier to stitch around the corners.
- Pin the centers of all four sides of the side panels and the zipper strip. Do not adjust those pins.
- Use a Stiletto (byAnnie Product) to guide your fabric layers around the corners when sewing and binding. (It really helps!)
- Learn what a scant 1/4" is and how it differs from a 1/4" seam allowance. When we sew the side panel to the zipper strip it's important to use a scant 1/4". I adjust my needle position to be inside the 1/4" mark by 2 clicks. Test your machine so you feel comfortable adjusting or measuring a scant 1/4". The binding is attached with a true 1/4" seam. This way none of the earlier stitching is visible.
- This bag is not as sturdy as I would like. I used our quilted fabric and the batting was a combination of bamboo and cotton. The Soft and Stable Foam Stabilizer is a better choice. It will keep it's shape nicely once items are stored in the bag.
Keep challenging your sewing skills by adding fun projects with fabric you already have in your leftover stash.
Bag making builds character and patience. Never rush a bag making project.
Make projects you can use in your home or gift to your family and friends. Regardless of the results - everyone loves a handmade gift.